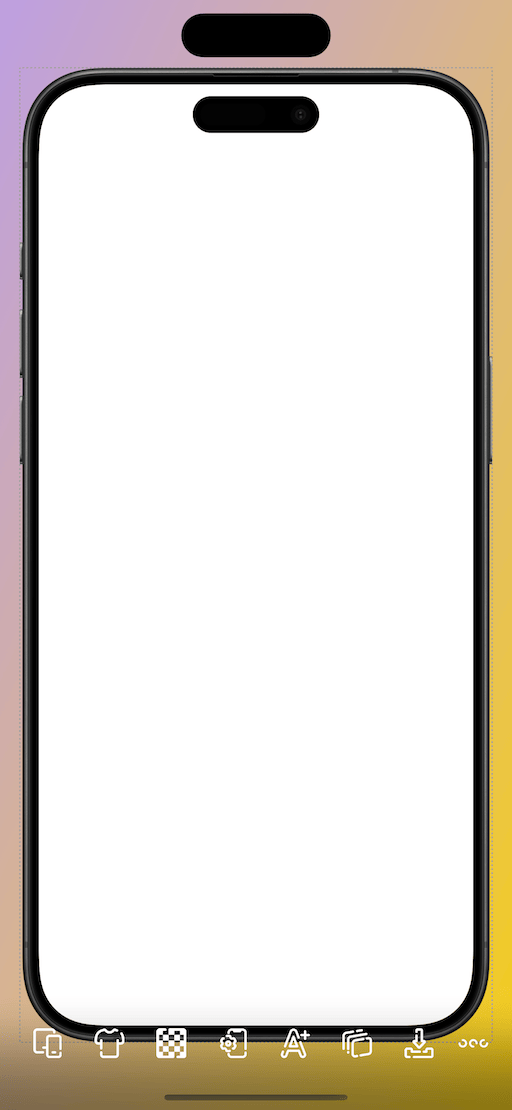
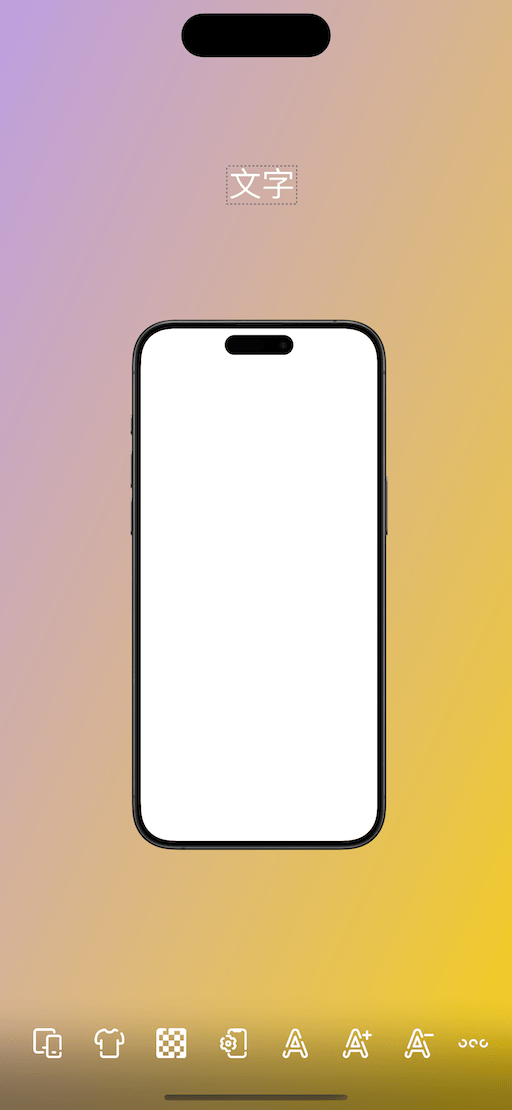
底部工具栏
从左到右分别是:
1 - 设备模型列表:点击后可以选择一个设备模型添加到当前的工作区中。
2 - 模型颜色:点击在当前选中模型支持的颜色中切换,部分模型暂时只支持一种颜色(如果画布上只有一个模型图层时,默认为选中)。颜色也可以在模型设置面板中修改,这里是为了更方便修改模型颜色。
3 - 背景设置:点击之后会弹出背景设置面板,比如修改背景画布大小,背景显示内容,添加毛玻璃效果等。
4 - 模型设置:点击之后会弹出模型设置面板,比如修改模型类型,模型颜色,模型位置或大小,显示样式和手势操作控制等。
5 - 文字设置:点击之后会弹出文字设置面板,比如修改文字背景色,文字颜色,字体和大小,位置等。
6 - 添加文字:点击之后会在画布上添加一个新的文字图层。
7 - 删除文字:点击之后会删除当前选中的文字图层(如果画布上只有一个文字图层时,默认为选中)。
8 - 装饰设置:点击之后会弹出装饰设置面板,比如修改装饰的位置,大小和旋转角度等。
9 - 装饰:点击之后会弹出装饰面板,点击之后将其添加到当前工作区中。
10 - 图层:点击之后会弹出图层面板,按顺序显示所有的图层,除了背景图层外,均可以左滑删除;所有图层可以长按拖动重新排序,修改图层的显示层级。
11 - 保存:点击之后会将当前的工作区生成为图片,保存到手机相册中。
12 - 分享:点击之后会将当前的工作区生成为图片,弹出系统的分享面板,可以选择相应的操作,比如复制,再其他 App 中打开,发送到其他设备等。
13 - 添加工作区:点击之后会询问如何添加新的工作区,是新的默认工作区还是复制当前的工作区,又或者是从模板中选择。
14 - 删除工作区:当工作区数量大于 1 时,可以操作删除
15 - 保存为模板:将当前工作区的内容保存为模板,方便以后直接以模板为开始,制作统一效果的图片。
16 - 模板:点击之后会弹出模板列表面板,显示所有的模板,点击名称可以修改,默认显示保存时间,点击名称以外的区域,使用此模板。
17 - 保存工作区:当设置中的自动保存工作区关闭之后,底部工具栏会显示此按钮,点击手动保存工作区。
18 - 更多:点击打开“更多”页面
Bottom Toolbar
From left to right are:
1 - Device Mockup List: Click to select a device mockup to add to the current workspace.
2 - Mockup Color: click to switch between the colors supported by the currently selected mockup, some mockups only support one color for now. (If there is only one mockup layer on the canvas, it is selected by default)
3 - Background Settings: Clicking on it will bring up the background settings panel, such as modifying the canvas size, the background display content, adding blur effect, etc.
4 - Mockup Settings: Clicking on it will bring up the mockup settings panel, such as modifying the mockup type, color, position or size, display style and gesture control.
5 - Text Settings: Clicking on it will bring up the text settings panel, such as modifying the text background colour, text color, font and size, and position.
6 - Add Text: Click it to add a new text layer on the canvas.
7 - Delete text: click it to delete the currently selected text layer. (If there is only one text layer on the canvas, it will be selected by default.)
8 - Decoration Settings: Clicking on it will bring up the decoration settings panel, such as modifying the decoration's position, size, rotation angle, and more.
9 - Decorations: Clicking this will bring up the decorations panel. Clicking on a decoration will add it to the current workspace.
10 - Layers: after clicking, the layer panel will pop up, displaying all the layers in order, except for the background layer, which can be deleted by sliding left; all the layers can be reordered by long-pressing and dragging, and the display level of the layers can be modified.
11 - Save: Click it to generate the current workspace as a picture and save it to the mobile phone album.
12 - Share: Clicking on it will generate the current workspace as an image and pop up the system sharing panel, you can choose the corresponding operation, such as copying, opening it in other apps, sending it to other devices, and so on.
13 - Add Workspace: After clicking it, you will be asked how to add a new workspace, whether it is a new default workspace or a copy of the current workspace, or you can choose from the templates.
14 - Delete workspace: When the number of workspace is more than 1, you can delete it.
15 - Save as Template: Save the content of the current workspace as a template, so that you can directly use the template as a start in the future to create a unified effect of the picture.
16 - Templates: after clicking it, the template list panel will pop up, displaying all the templates, clicking the name can be modified, the default display of the save time, click the area other than the name to use this template.
17 - Save Workspaces: When the auto-save workspaces in the settings is disabled, the bottom toolbar will show this button, click to save the workspaces manually.
18 - More: Click to open the "More" page.


